Thursday, January 13, 2011

Easy Ruffle tutorial

Okay, I have been working on a little project that I decided needed a pleated ruffle on the outside edge. I have never done a pleated ruffle, so I just decided to wing it. And, it was super easy and looks great when finished! So, I thought I would share.

First, I pulled out a handy-dandy craft stick. I have a million of them on hand because Brigham is slightly obsessed with them. Then, I added some marks. I just eye-balled what looked good, but in case you are interested, the measurements are 2" for the length and 0.75" for the fold. (I am sure that must be some mathematical ratio of some perfect form!) Anyway, I laid the craft stick down and put the "length" mark at the top edge. If you are just starting, this would be the edge of your ruffle fabric.
Then, I folded the fabric from the bottom back over the stick until it got to the "fold" mark.
Pull the craft stick out, and pin your fold down.
Repeat as many times as you need to get around your piece.
Then, you put your seam in, and flip it out. This is what the finished ruffle edge on mine looked like...
Aren't you dying to see what I made? Oh well, you will have to wait until I get Joy's done too...

Saturday, January 8, 2011

Sock Puppet tutorial

So, you want to make super-fantastic sock puppets that all the neighbor kids will be jealous of? Well, I guess I can let you in on my little secret. It is a piece of plastic in the mouth.
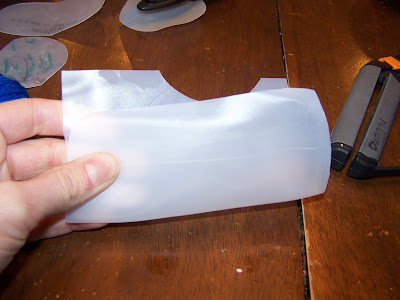
Here's how it works: Get an old milk jug and cut out a section of flat surface.
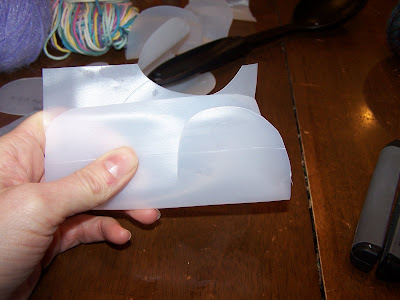
Now, fold that piece in half and cut a couple of ovals out. The size of your flat space will determine how many ovals you get out of it. And, your ovals should be about the size of your little one's finger-to-thumb space where they would normally stick the sock puppet mouth.
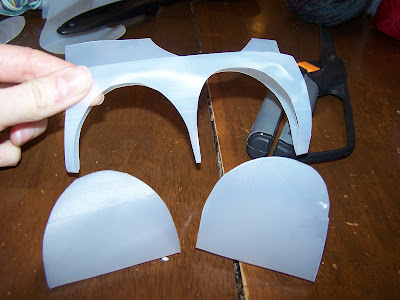
I can usually get two ovals out of a large flat. One..
and two. These don't need to be perfect, they are just going to be inside the mouth to give it some permanence.
Now, this step is really important if you want to spare your fingers glue gun misery. Push the toe of the sock inside to make a pocket. Don't go too far back, just a couple of inches. Test the space by sticking your plastic oval in it. The folded edge goes in first and should hit the toe of your sock, the rounded edges should about sit on your socks lips.
Now that you have your sock in position, take your cut and folded plastic between finger and thumb,
and run hot glue along the edges of both sides. Don't worry about that spot where you are holding, you can go back and get that later.
Now, this is the trickiest part of all. Really, it is persnickety. And I am not just saying that 'cause I like the word. You need to slip that hot-glued plastic into the pocket you created for the mouth, but you don't want the hot glue to touch the sock until it is in place. Just slide it in and squish it down. But, don't squish too hard or you will glue his mouth together. (If you need to do this for therapy since you can't do it to your kids, go ahead, glue those lips together.)
When you have this done, you can go back and glue those little spots on front and back where your fingers where.
Once you get the mouth in, it is the traditional stuff - eyes, hair, etc. Okay, I only do eyes and hair. But let me tell you, this little plastic bit makes the sock puppet SO much more functional! It will get played with far more often, because the mouth works! Hope you have fun!

Sunday, January 2, 2011

Happy Birthday Banner

Did I mention my most favorite gift for Christmas this year was a Silhouette? Well, I got one, and am in LOVE! Today was Joy's birthday, so I whipped out this super cool pendant banner, and she LOVED it! And, it was pretty easy.

To make it, I cut triangles from cardstock, and then cut her letters (500 pt Curlz font) out of coordinating paper. I glued the letters on with good old-fashioned Elmer's Glue (since I didn't have anything easier on hand). Then, I punched holes in the corners and threaded them through on 5/8" grosgrain ribbon. All in all, it was a pretty easy project, and the receiver appreciated it, which is even better.

I ordered a laminator which was supposed to have arrived on Friday, but when it gets delivered tomorrow, I will be laminating these puppies so this can be pulled out every year. I have decided that, when I do the boys, I will use darker colors for the background, they stood out much better. And, since they are boys, I will use a chunkier font so it shows up better. Who knows, I may even redo a few of Joy's. Nah, who am I kidding?
Posted by Picasa