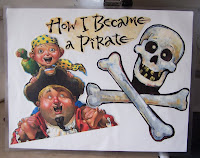
 To make a dustjacket placemat, collect a piece of posterboard, clear contact paper, a pair of scissors, and a gluestick (if you really want).
Cut your posterboard into quarters, and this gives you the perfect size for a placemat. Now, you get to hack up your dustjacket. Look all over for pictures, not just on the front and back. I also like to cut out the little book blurb, but I don't always use it. Cut them out however you like. I'm not a big cut-on-the-line kind of girl, so I give about a quarter inch edge around them.

Now, assemble all your cut-outs and arrange. If you want, use your glue stick to tack them in place. However, you will be covering the whole mess in contact paper, so there is no real need.

Finally, cover the whole thing with clear contact paper. I always cut more contact paper than I need, much better have room for error than end up with not enough. I cut my pieces 15.5" tall and the just used the width of the contact paper. I tried to take a picture of the process, but I was having a hard time just getting the stuff on straight.

When you get that done, you have two options. You can just flip it over and repeat the contact paper on the blank side, or you can put more pictures on and make it double-sided. I always make them double-sided.

Lastly, trim your edges down to 3/8th of an inch. That's what it says to do on the contact paper directions, so that's what I do. And, viola! Dustjacket placemats. Here are some others that I have done to give you an idea of possible layouts.


 What's that you say? You would really like to seem them closer up so you get all the details? Oh, well, if you insist.
 What's that? How do they actually look in


