Friday, October 8, 2010

Flower pin

I found this cute flower pattern the other day on Wise Craft, and couldn't wait to try it. Then, I found a cute hat at Kohl's, but it had a HORRIBLE flower monstrosity on it. So, I bought it, ripped the monstrosity off, and have been looking for something to replace it. This flower idea was perfect. Go here to find the instructions. I did two tonight, and they were really fast and easy. I think one would take less than 10 minutes total, if you were doing them one at a time. Of course, I never do just one thing at a time!
With a pin attached to the back, they made my two blah hats pretty darn cute!

Posted by Picasa

Sunday, October 3, 2010

Lunch box re-vamped

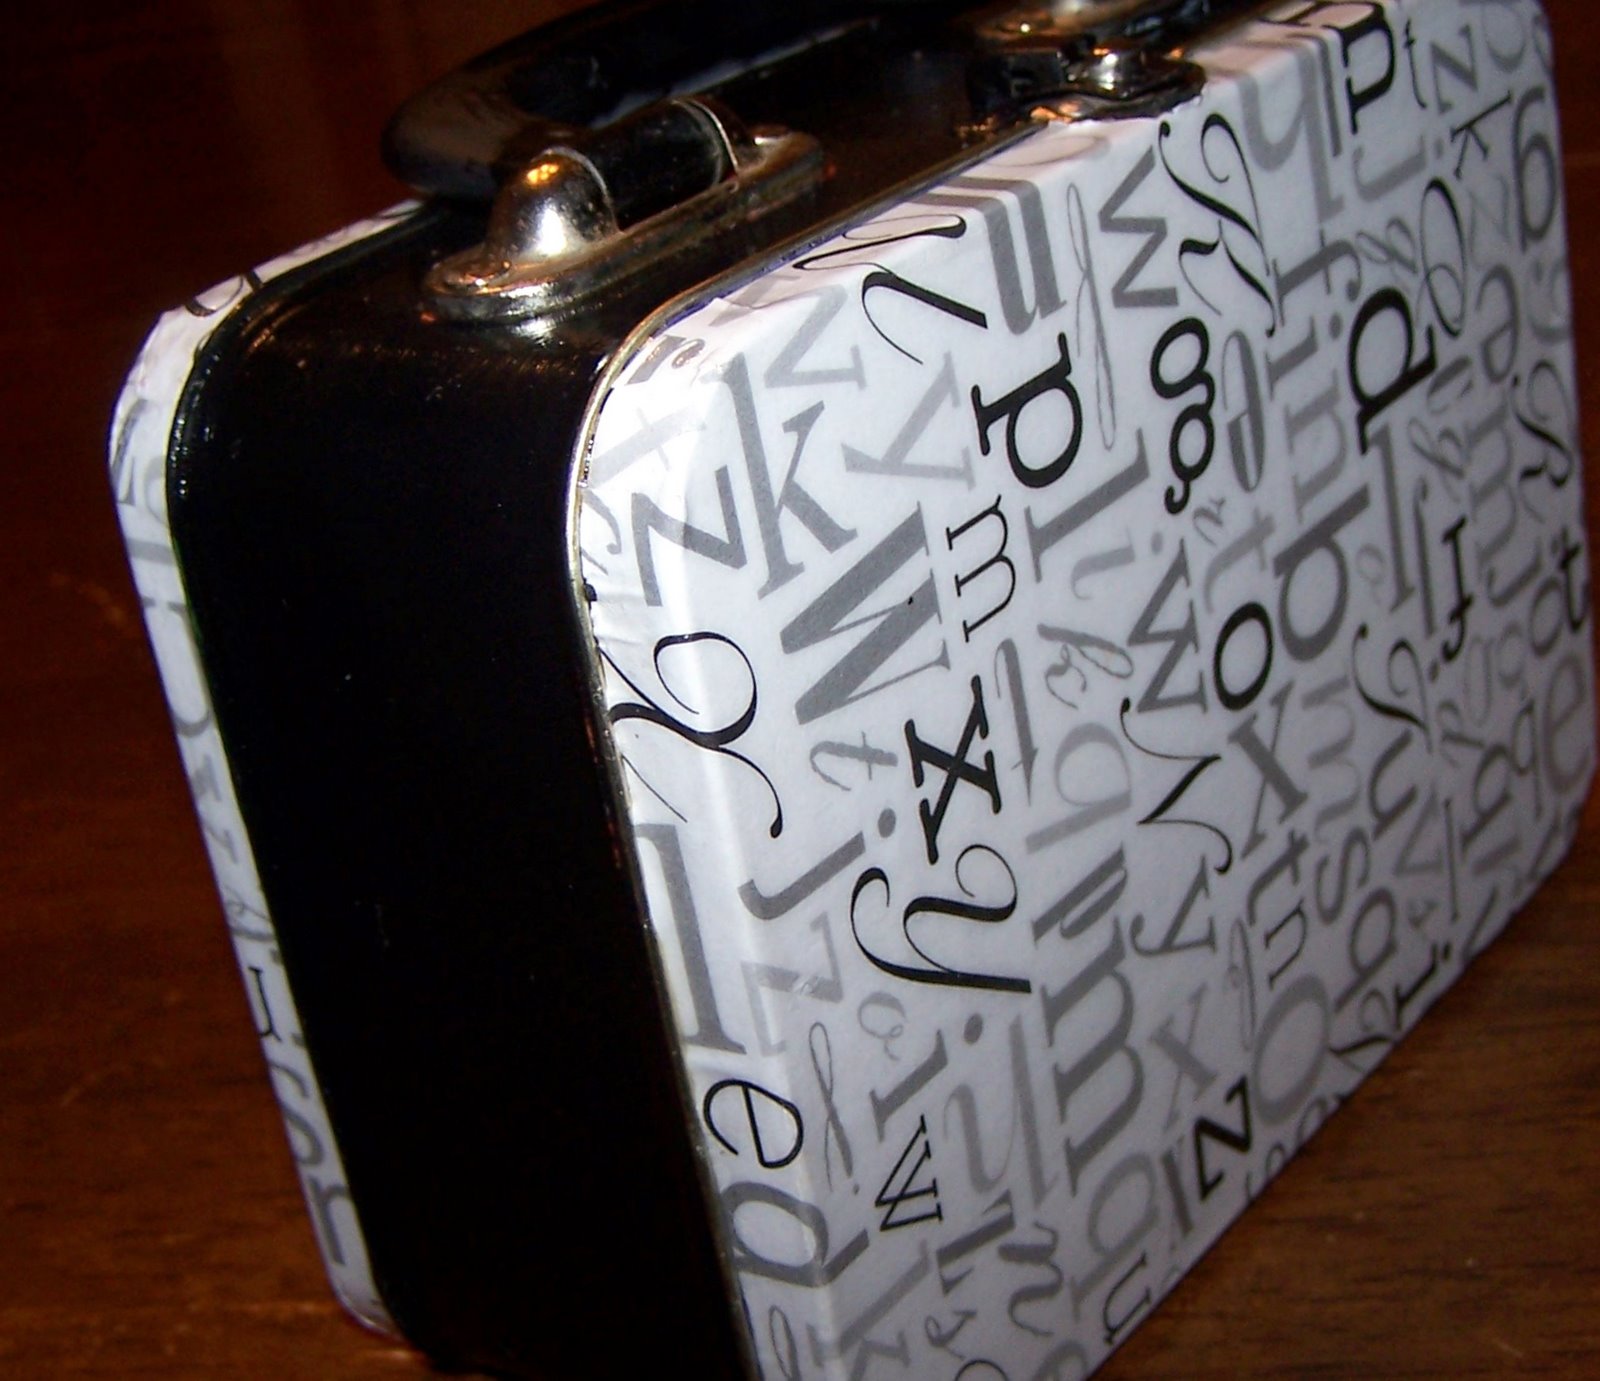
I went to the thrift store the other day, in search of a frame to make this fabulous wall accessory for Joy's room, but I couldn't find what I needed. Instead of going home empty handed, they boys and I headed over to the Halloween section to see what treasures we could find. And we ended up with...this - Yes, it is a Wizard of Oz lunch box. I didn't know what I was going to do with it, but I knew it would be worth the $1.29 I paid for the box. So, I took it home and the wheels started turning. Brigham, as you know, is obsessed with letters and words. I have taken to finding creative ways to make more alphabets for him. He doesn't seem to be able to get enough. What if I made him a letter lunch box? He has lots of letter magnets, and if I could transform this lunch box into something a little more...boyish and letter-y, he could put the magnets in the box and it could go with us to doctor's appointments and such. It would be perfect! It would combine practicality with learning, and give me another fun project to work on! Alright, I know I am not making any sense, so I am going to give you a sneak peek just so you don't doubt my sanity.
See, the magets stick to the outside
But are stored on the inside.
Now that you no longer doubt my sanity, the instructions:

First, Oz had to go. I taped up the parts I wanted to stay silver (the snap was just too difficult, it got sprayed) and took black spray paint to the sides.
This is what it looked like post-spraying. I kind of like the two-color snap. Then, I modge podged twice over the black. I went with the cheap black spray paint at Walmart, and although effective for turning things black, was very drab looking when done. I figured the modge podge would give it some shine and durability.Then came the tricky part, the application of the letter paper. Unfortunately, I didn't get a single picture of the process. My hands were a little too gluey, and the process was a little too experimental. Basically, I cut the paper approximately the size of the box, put down a layer of modge podge, and stuck on the paper. The edges were a little rough, so no close-ups will be disclosed. After adhering the paper, I put on two more layers of modge podge, again for durability. This time I could have done without the shiny, but I am too cheap to go get a matte version. This is what I ended up with -

Word to the wise - if the cute lunch box you picked up at the thrift store has rust on it, you may want to cover it with spray paint, sealant, or some other magic. I didn't, and after the second outside layer of modge podge, the rust soaked through. Oops!
Thank heavens it was on the back, and the 5-year-old boy who gets this box isn't picky!

Friday, September 17, 2010

Yo-Yo pacifier holders

My sister-in-law Janet was having a baby shower this week, and I was at a loss as to what to make for her. All of my usual projects require a sewing machine, and since my trusty Viking bit the dirt a year ago, I haven't summoned up the courage to brave the very possible one my dad got for me at a garage sale. So, I had to find something that didn't require machine sewing. Then I remembered being on Etsy a few weeks ago and seeing this very cute pacifier holder. See the original at Creations by Kara.

Being the ambitious but not necessarily rational person I am, I thought, "Gee, that looks cute. I bet I could make one of those!" So, I ran to Walmart, my secret stash of cute fabric being too secret to find for the moment, and picked up a few inches of ribbon.

Side story. When I arrived at the Walmart cutting counter, I was very careful to ask the friendly woman helping me what increment they cut by, yardage or inches. She politely told me they could cut by the inch. So, I told her I needed 5 inches of each fabric. You will imagine my astonishment when, out of the blue, some random woman in a motorized cart comes around the corner and says to me, "You know, it would really be easier for her (the Walmart associate) if you would ask her to cut your fabric in yardage." What? Who is this lady and why does she think she has the right to tell me how to get my fabric cut? You must be nuts! She must have been too busy interfering in someone else's business to have been there when I very carefully verified that I could get what I wanted cut in inches! Am I using to many exclamation points? I was definitely experiencing in exclamation points! I just said, "I checked before I asked, and they can cut to the inch. I want 5 inches." Let's just say that this did not end the discussion, but I have probably rambled long enough.

So, after I obtained my ribbon, I picked up some suspender snaps and headed home. I found directions for fabric yo-yo's from Heather Bailey. Fortunately for me, I am a craft pack rat so I had plenty of ribbon and vintage buttons on and for the rest of the project. After declining many offers of help from my children, this is what I ended up with:


I have decided that if we have another baby girl someday, it may well be worth forcing her to use a pacifier so I can make some of these babies for her!
Posted by Picasa

Sunday, May 3, 2009

For Angela

I have a good friend, Angela who I just love to talk about projects with. This evening, while I was working, I had to tell her about the fun things I was working on. So, here they are. I had so much fun with Joy's skirt last year, that I decided to make a couple for myself to just kick around in. I would take a picture with them on, but I am afraid my legs aren't much darker than the cream of the fabric, and I am not so sure that it would really show the skirts to their best advantage!

I got fabric to do two skirts, but I decided to use the leftover scraps to do a patchwork skirt. Hence this one. If you want to try it, I found the skirt instructions at Just Tutes.

I also found a pattern for pin cushion chickens, and they are my new favorite thing to make. Here is the one I worked on tonight.

Tuesday, March 24, 2009

Dustjacket Placemats

One of my very favorite origial ideas is dustjacket placemats. I love getting new books, but I always feel bad about the dustjacket. I mean, what are you really supposed to do with the dustjacket on that book? I have a hard enough time trying to get my kids not to rip the pages of the book, the dustjacket is history. So for years, when I have gotten a new book, I have taken the jacket off and put it in a file. Then, inspiration hit! And here is my great idea -

To make a dustjacket placemat, collect a piece of posterboard, clear contact paper, a pair of scissors, and a gluestick (if you really want).
Cut your posterboard into quarters, and this gives you the perfect size for a placemat. Now, you get to hack up your dustjacket. Look all over for pictures, not just on the front and back. I also like to cut out the little book blurb, but I don't always use it. Cut them out however you like. I'm not a big cut-on-the-line kind of girl, so I give about a quarter inch edge around them.
Now, assemble all your cut-outs and arrange. If you want, use your glue stick to tack them in place. However, you will be covering the whole mess in contact paper, so there is no real need.
Finally, cover the whole thing with clear contact paper. I always cut more contact paper than I need, much better have room for error than end up with not enough. I cut my pieces 15.5" tall and the just used the width of the contact paper. I tried to take a picture of the process, but I was having a hard time just getting the stuff on straight.
When you get that done, you have two options. You can just flip it over and repeat the contact paper on the blank side, or you can put more pictures on and make it double-sided. I always make them double-sided.
Lastly, trim your edges down to 3/8th of an inch. That's what it says to do on the contact paper directions, so that's what I do. And, viola! Dustjacket placemats. Here are some others that I have done to give you an idea of possible layouts.

Tuesday, March 17, 2009

Bows with Panache

As you have probably figured out, I am a bit obsessive. When I do something, I want to do a MILLION! I tell myself that I am just a real artist, and I want to work on something until I get it right. Not surprisingly, after doing my St. Patty's korker bows, I wanted to do some more. Fortunately for me, I have a lot of ribbon just sitting around, so I had plenty of material to work with. So, I tried using a bunch of different ribbons, and here is what I came up with.
What's that you say? You would really like to seem them closer up so you get all the details? Oh, well, if you insist.
What's that? How do they actually look in someones hair? Well, Joy is usually willing to model for anything.
Alright, I know you are just being polite, so I won't subject you to anymore pictures. Just the commentary.
I figured out why people don't generally use satin ribbon. It curls just fine, but it is heavy, so the curls tend to pull out. I will only use them as filler, and make them shorter. Otherwise they just stretch out too long. I really like how grosgrain holds its exact shape, as does the sheer ribbon I have tried. Overall, I like bows with lots of different kinds of ribbon, not just different colors. It gives them more texture.

Tuesday, March 3, 2009

Recycled Crayons

What do you do with all those broken crayons? Turn them into a fun craft project, of course. Although, I will say, I think I had as much or more fun than the kids did on this one. I actually started breaking apart only slightly used crayons to make these. (True, I always stock up at the beginning of the school year, but that is beside the point.)

To make, cut the wrapper off your crayon - I recommend a slit down the side with a box cutter versus tearing the paper off manually - and break the crayon into pieces. Then, put the broken pieces into a muffin pan.

You can use a regular muffin pan, but I found that those end up so big they are hard to use. Instead, I use a mini-muffin pan. I had a friend who used a mini-donut pan, and those looked really cool, but I don't have one. In these pictures, I actually lined the pans with foil, but it was a real pain, and since we don't use the mini-muffin pans for muffins, I did the next batch with no foil. (Maybe a trip to the thrift store is on the horizon.) Bake your crayon bits at 300 degrees. Your time required depends on the number of crayons and size of the muffin pan. With the mini I started checking at 5 minutes. The ones that weren't as full were definitely entirely melted, but the more full ones weren't done yet. You need to balance and not over cook because over-cooking (aside from smelling really melty) seems to separate the color from the wax and produce uneven color distribution in the crayon. When the crayons are just melted, remove from oven. I dragged a toothpick around the top of the crayon soup to give them a marbled look, but it doesn't really effect anything but the top layer.

Then, I popped them in the freezer to set. When they were hard, I rocked the edges of the pan back and forth (like an ice-cube tray) and whacked them upside down on the counter. They came out pretty smoothly.

The pan is no longer food-friendly, but we have cute crayons. They work really well for covering large areas, but not for detail coloring. Also, have fun putting different color combinations together, I am always surprised at what comes out nicely and what looks gross. Oh, don't stir when they come out of the oven unless you are hoping to blend into one solid color.